Flutter Firebase Android Setup

As I told in the ListView from Firestore post, Firebase is an exceptional Backend-as-a-Service. It is now owned by Google. There are many services offered under Firebase. This includes but is not limited to Cloud Firestore, Realtime Database, Firebase Auth, etc.
Today we’re gonna talk about the initial setup needed to use firebase on an Android App created using Flutter.
Create a new Firebase project
To use firebase on any of our products, first, we have to create a Firebase Project. For this, go over to Firebase Website and click on Go to console.
Once you’re in the console, click on Add Project button.
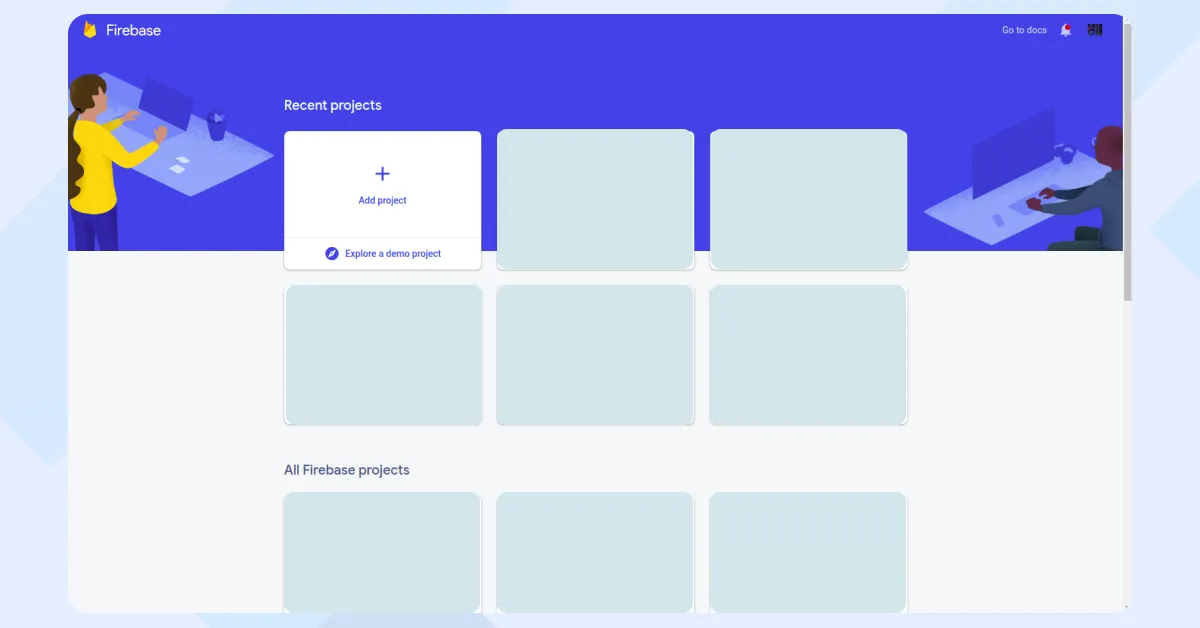 If you’re first time accessing the console, DONT worry about not seeing
When you click there, you’ll be asked to give a name to our firebase project. Give a name you like here.
After this, you’ll be asked whether you want to enable google analytics in our account or not. If you want analytics, click continue and select an analytics account for this app on the next page.
After this step, you’ll see a screen that says, it is creating your firebase project. And when you see that Your project is created, just press continue and you’ll arrive in the Firebase console.
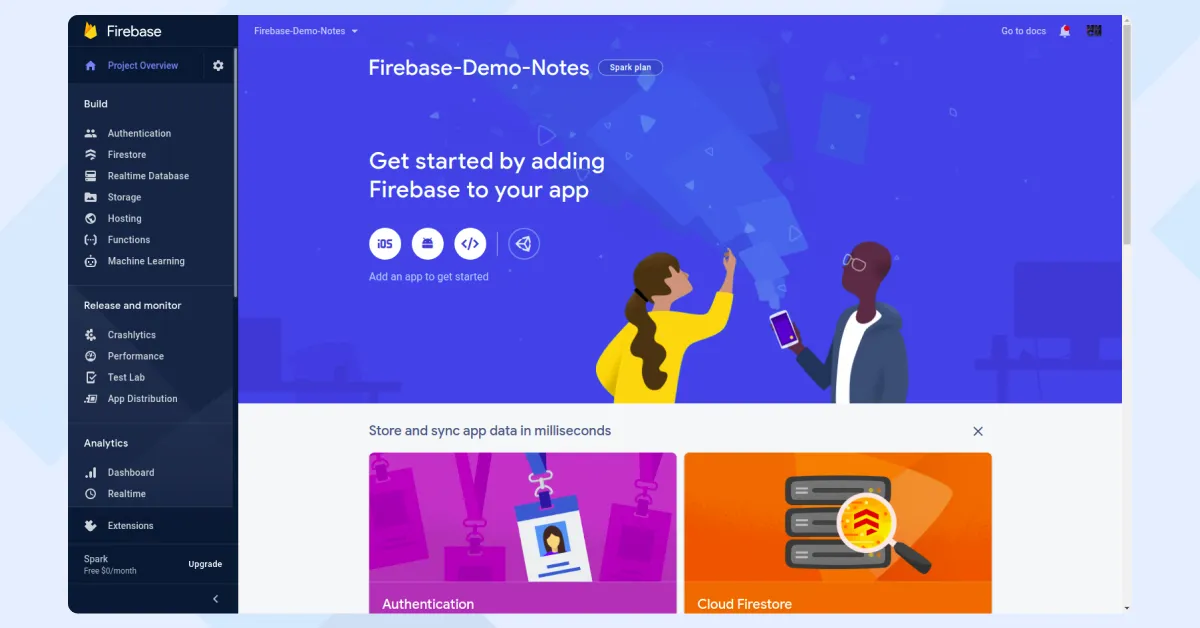
Add App to Firebase Console
This is going to be the largest step in here 😆.
Registering Firebase App
First of all, click on the small android icon under the words Get started by adding Firebase to your app.
This will bring up a screen like this.
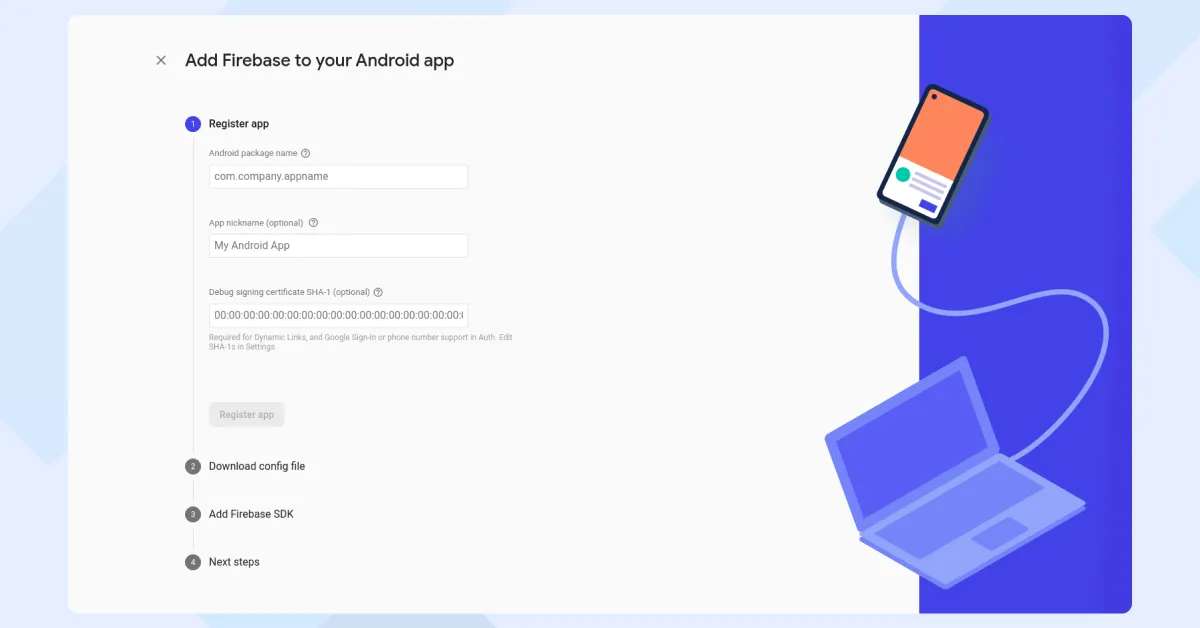
On this screen, we have to fill out three things.
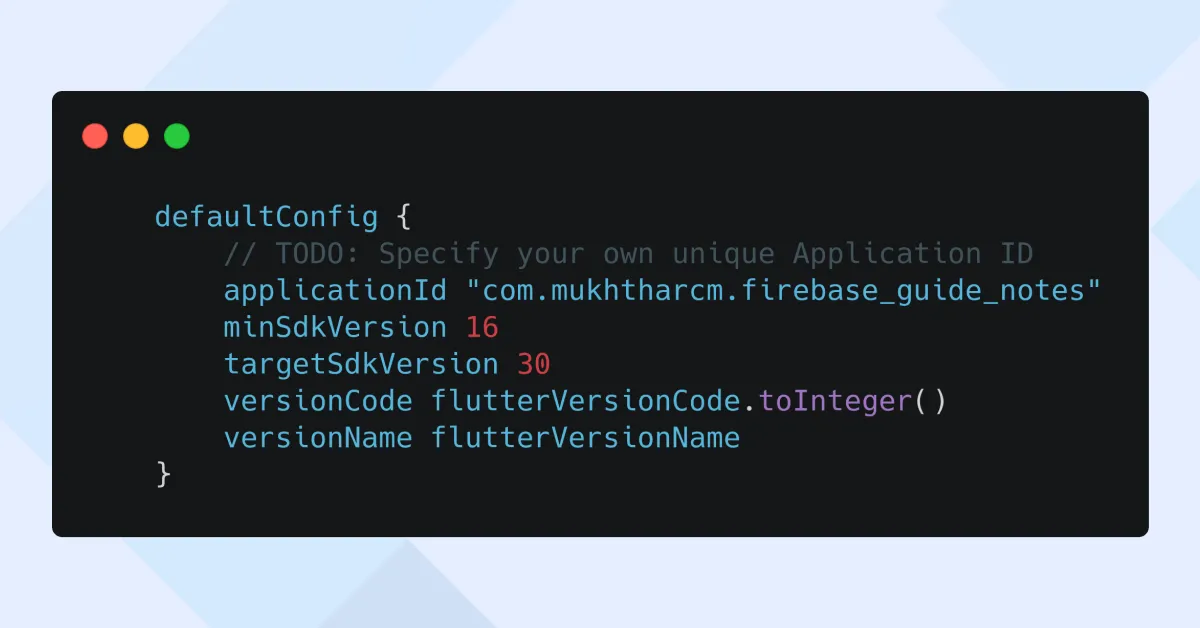
First, we have to fill in the Android package name.
We can find this in build.gradle file which is located inside the app folder inside the Android folder in the Root of our Flutter Project.
Please notice that we have to open the
build.gradlefile inside the app folder, and not the one inside the Android Folder.
In this file, locate a line which says applicationId and copy the id.
Then just paste it in the first textfield in Firebase Console.
In my case, it was com.mukhtharcm.firebase_guide_notes
In the second field which says application nickname, put a name to identify this app in Firebase Console. It is optional and only used to identify this app on the Console website. I chose to go with Android App for Firebase Guide.
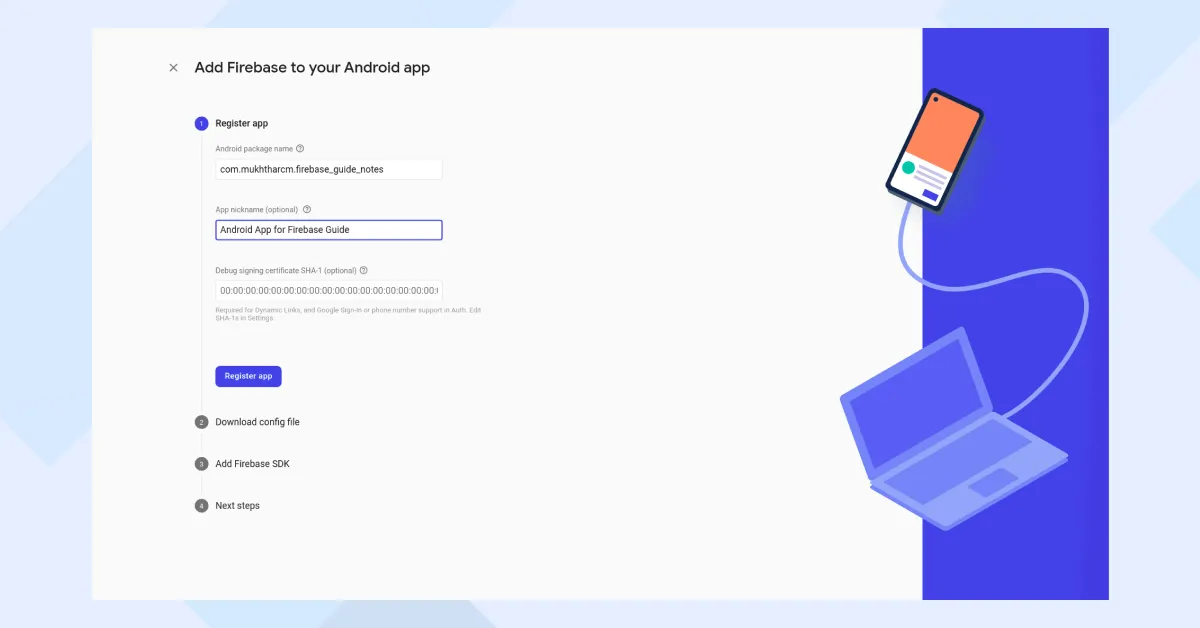
We’ll leave the 3rd Field for now. It is the debug signing certificate. It is only needed when we use dynamic links or Firebase Auth Phone login service and such. We can add these debug signing keys anytime later.
After this, click on the Register Firebase App Button.
Downloading Config file
Next, we’ll be asked to download a file named google-services.json
This file contains all the info our app needs to communicate with Firebase.
So download this and put it inside the app folder inside the android folder at the root of our Flutter project.
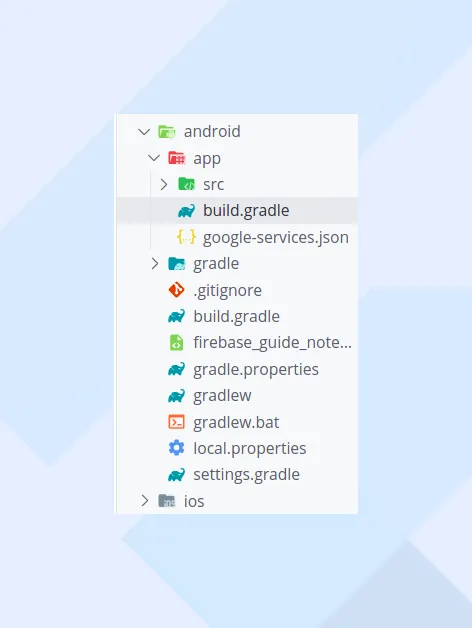
Please be careful, if we didn’t put it in the right folder, it won’t be useful and will give us a bunch of errors once we go to building our apps.
Adding Firebase SDK
This is the trickiest part.
Here, we have to make changes to 2 files.
Name of both of them is build.gradle😲.
So if we are not careful, we’ll end up in a lot of trouble.
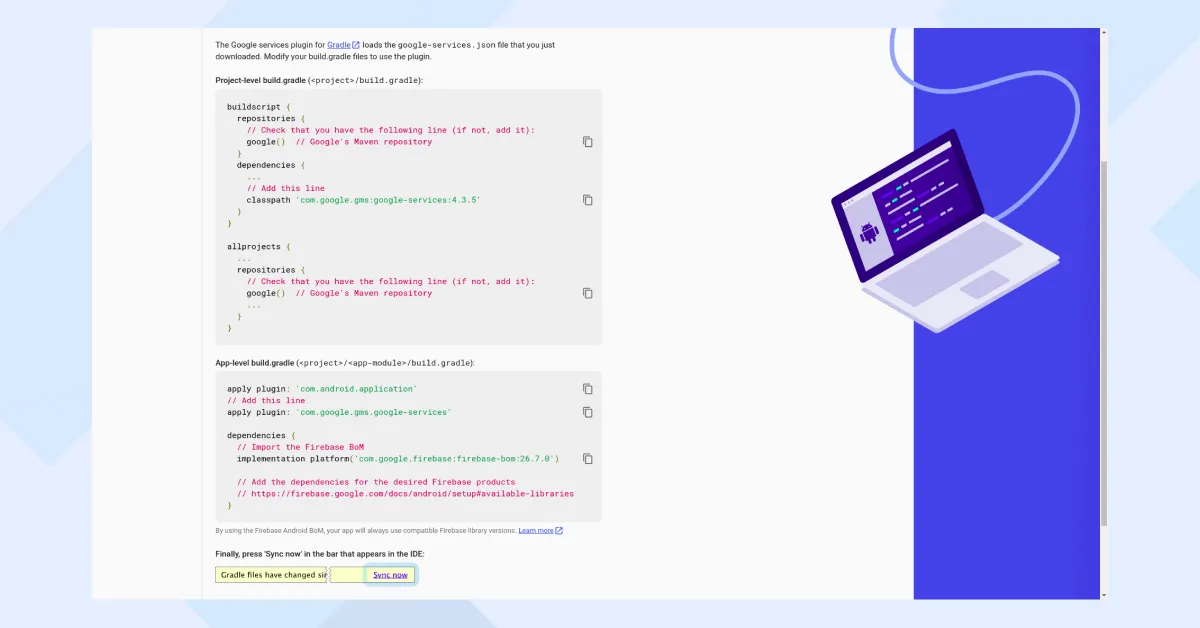
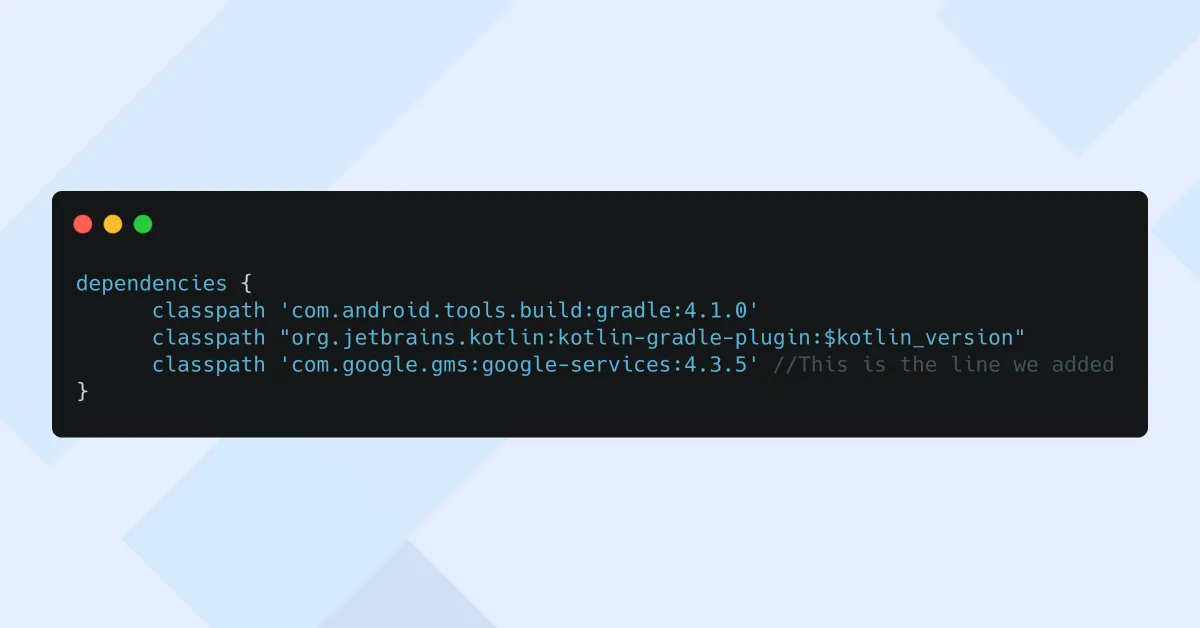
First of all, open build.gradle file inside the android folder which is in our project’s root.
Around line 10, we can see a line that says dependencies. paste below code inside the curly brackets of dependencies.
classpath 'com.google.gms:google-services:4.3.5'After adding, our dependencies part look something like
Next, open the build.gradle file inside app folder inside android folder which is in the root of our Flutter Project.
In this file, locate a line that says apply plugin: 'com.android.application'.
it should be around line number 24.
Just below the line, add the following line of code.
apply plugin: 'com.google.gms.google-services'and also locate a dependencies section as in the previous file. in this file, it’s around line 57 or so. Then add the below line to the dependencies section.
implementation platform('com.google.firebase:firebase-bom:26.7.0')If you have opted for analytics, you’ll also have to add the dependency for it as well. You can find this in your console window.
⚠️
Another important thing which is not in the instructions of Firebase Console is, change theminSdkVersionto 21. Otherwise, it’s gonna throw errors on us when we start building.
I am quoting this because it happened to me many times. 😆
After these steps, click next and then click on Continue to console button.
Plugins
For Firebase to work with our Flutter app, we have to add a few plugins.
the most important one is firebase_core. It is used to initialize Firebase in our App.
If we have to use Firebase Cloud Firestore our Firebase Auth, we have to add plugins for them as well.
dependencies:
  flutter:
    sdk: flutter
  cupertino_icons: ^1.0.2
  firebase_core: ^1.0.1 # this is the Firebase Core Plugin
Initializing
After the above steps, It is time to Initialize Firebase in our App.
It’s always a better Idea to initialize it in our main Function.
That way we won’t see a bunch of error regarding Plugin not initialized blah blah blah when we run our app.
For this, let’s make the main function of our app like this.
void main() async {
  WidgetsFlutterBinding.ensureInitialized();
  await Firebase.initializeApp();
  runApp(MyApp());
}
notice that we have to make the function async and have to await the initialization of the Firebase App.
By this, we are done adding Firebase to our Flutter Android App. I’ll continue writing more Firebase-related tutorials. For all of them to work, it is a must to add Firebase support to our App Correctly 😁.
Let me know your opinions in Twitter or drop a mail a [email protected].
Finally, if you found this helpful, please share this within your reach so that more people can benefit from this. And Follow me on Twitter for getting more posts like these 😉.
If you fancy reading more posts related to Firebase, go over here.